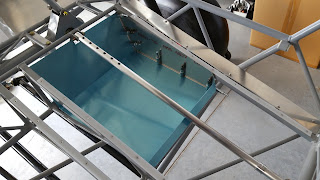
I began by measuring for the base of the storage pan. I cut
the piece to fit side to side and left it long to give me some room for
trimming to fit after the bends were made. I made the first bend for the front
of the pan. I had to cut a notch out for the front of the seat rail. Once that
was cut out, I could fit the pan in place to measure for the rear bend. After I
made the first rear bend, I check the fit. I measured for the z bend to finish
off the rear of the pan. Then I trimmed the excess off to complete the pan.
Next I began making up the right side by cutting a blank to the overall size needed plus some for the rivet flanges. I placed the pan in place and set the side blank in position to transfer the angles required. I bent the forward flange first and test fit it to the pan. I then bent the bottom flange. This left the rear flange to cut and bend. I had to determine how to finish the rear of the sides. Once I determined how I wanted them to look I cut and trimmed them to finished form.
Next I began making up the right side by cutting a blank to the overall size needed plus some for the rivet flanges. I placed the pan in place and set the side blank in position to transfer the angles required. I bent the forward flange first and test fit it to the pan. I then bent the bottom flange. This left the rear flange to cut and bend. I had to determine how to finish the rear of the sides. Once I determined how I wanted them to look I cut and trimmed them to finished form.
After the right side was formed, I clamped it to the pan and
used the rivet fan to layout the rivets. I marked and drilled with a #40 bit and
cleco’d the side to the pan. I then proceeded to clone the other side. Once
both sides were formed, drilled and cleco’d to the pan, I test fit the assembly
into the fuselage. This allowed me to determine if any final trimming that was
needed.


