With a lot of help from Paul and Steve, I got the wings installed back on the plane today! A major milestone in this build.


Paul's pics


Steve's pics and video...


With a lot of help from Paul and Steve, I got the wings installed back on the plane today! A major milestone in this build.
Paul's pics
Steve's pics and video...
Getting ready to put the wings on for the final time! Cleaning up the shop and making room for the process. Should happen Sat or Sun.


I completed the elevator finishing tapes. I also attached the trim tab. I need to finish with the horizontal stabs and then I can mount all of it.


I noted that the factory has upgraded the rudder cables since I purchased my kit. My original cables were 3/32" and they now ship with 1/8". I already had my cables made up but decided for safety's sake to upgrade. This meant cutting the cable ends off and passing the new cable all the way from the rudder to the pedals.
Before I could accomplish this, I had to figure out where the cable passed through the fabric so I could burn the hole. I messed this up on the left side, ended up with an oblong hole. Once I got it located in the correct spot, I stuck a patch on the inside.


Then, I spliced both the old and new cables together with a piece of heat shrink so I could just pull the new cable through without having to climb in the fuselage. Worked perfect.

After making up the new cable end for the rudder, I mounted it. I had obtained a couple of cable fairings from a local Kitfox guy and set about prepping them to mount. I painted them and left them to cure overnight.
This morning I installed the front rudder cable to the pedals using the same procedure as I had before.


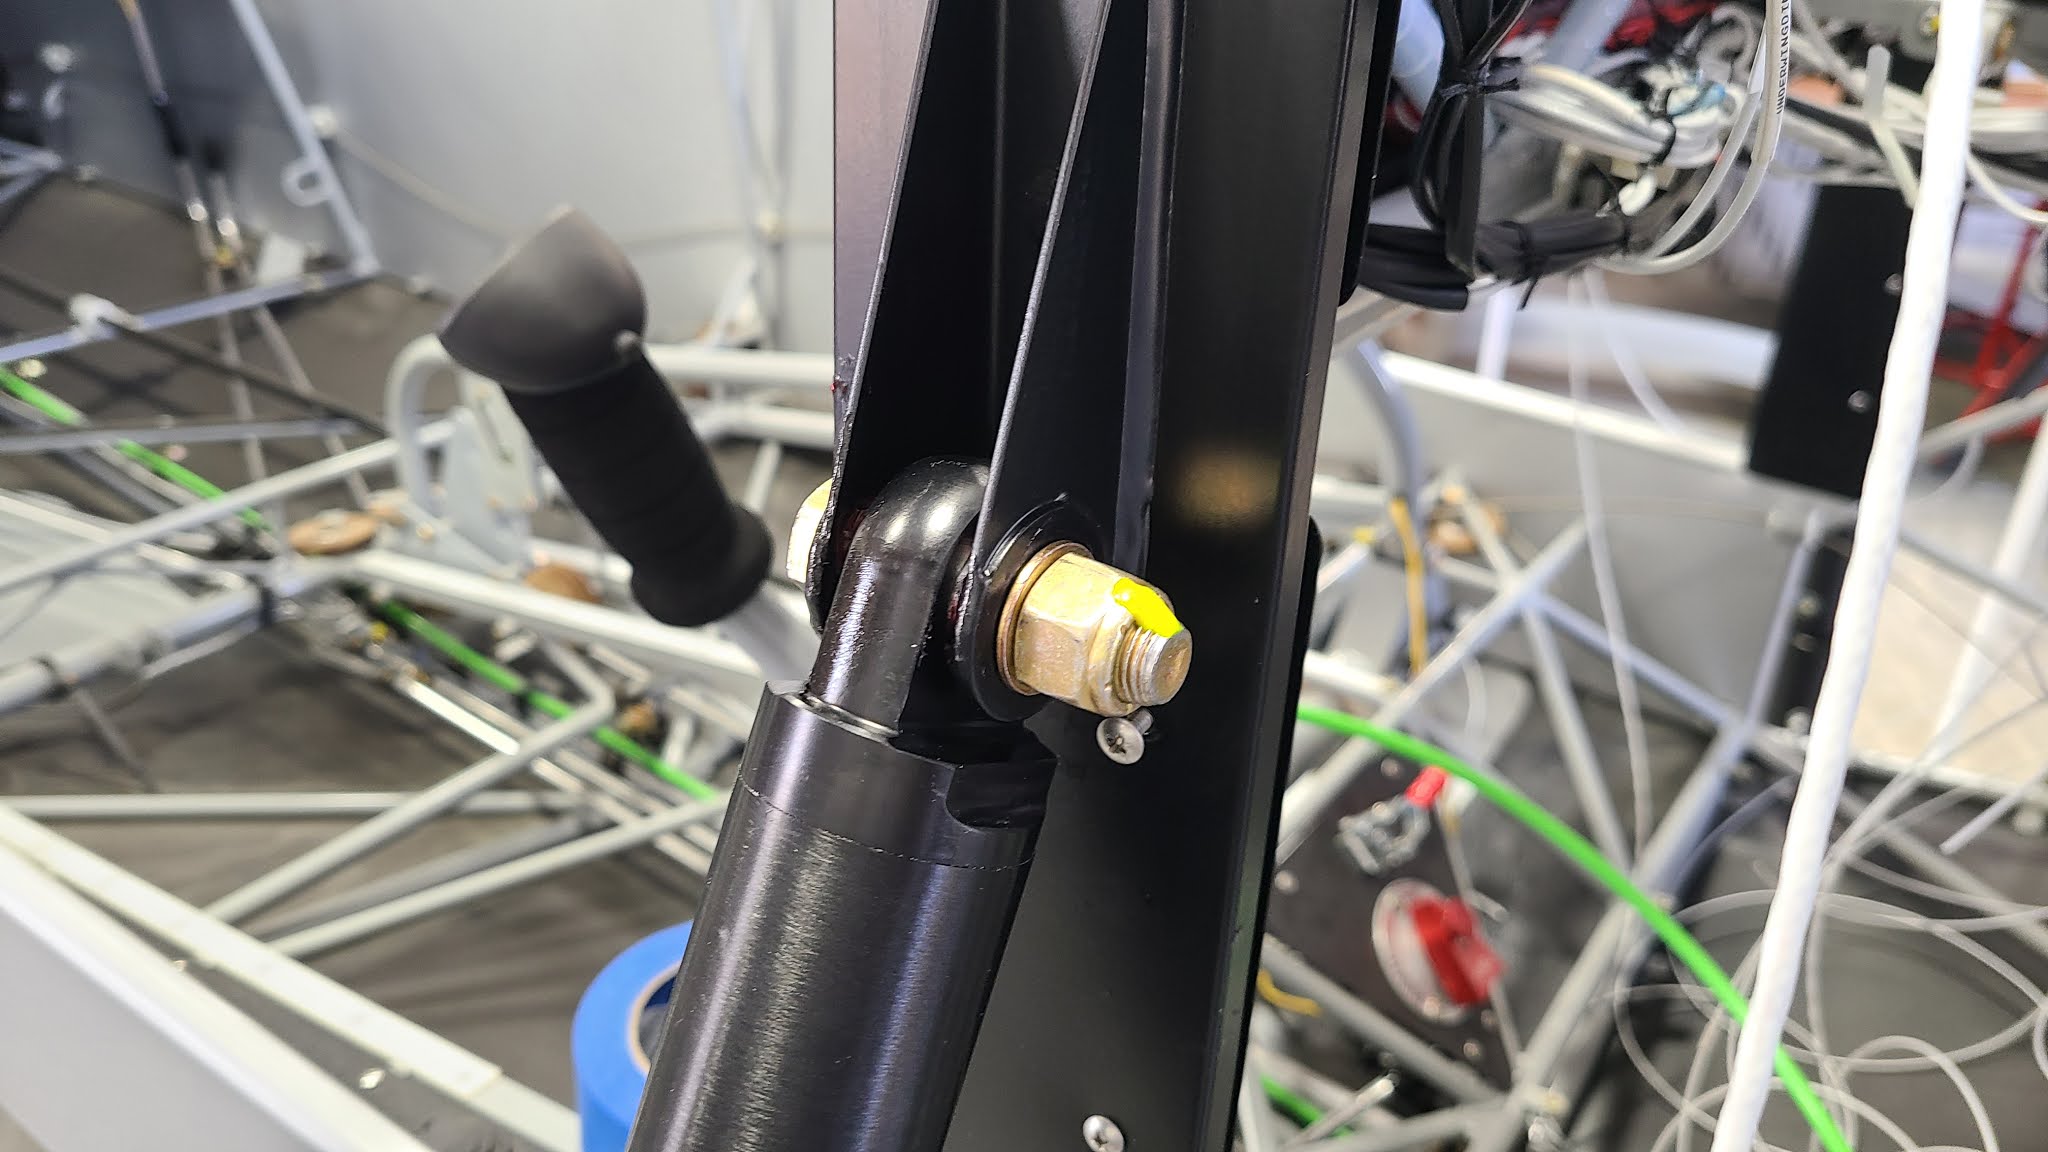
Next, I installed the cable fairings while I had tension on the cables. Using the laser level I got them mounted. I had also mounted an inspection ring yesterday, I cut out the hole today. It allows access to the air valve on the shock.


This evening, I mixed up some SuperFill and applied it around all the protrusions to seal the fabric to the stabilizer. I'll let that set up overnight.


Did the right side of the tail today. Just a repeat of yesterday. I've got some detail work to do to finish both sides up tomorrow. I have to remove some bubbles I didn't get out and some tape work on the joints where the stripes meet.


I mounted the N number and the stars and bars on the the left side of the tail today. I made some deviations from the way the graphics were printed. I moved the bars closer to the star because I preferred having a little wider stripe at the trailing edge of the rudder than what was laid out. That took quite a bit of ciphering to get it all to look right with the proper spacing etc.
Anyway, I started by cutting everything into individual pieces, the star and the stripes. I had to mount the N number first. The laser level really came in handy for all of this. I double checked I had the head rack of the plane zeroed out and then set the laser level where I wanted the bottom of the N number to be, cleaned the surface again, mounted it and admired my work. Actually, the next step was to take the laser level to the other side and repeat the process since it was already at the correct height. So, I mounted the right side N number,
I came back to the left side and mounted the star. This is when I began by repositioning the bottom stripe, closer to the star, since it is on level. Once I was happy with the position, I mounted it. The next stripe to mount was the most vertical one. I set the distance from the leading edge of the vertical stab and used a round object I found in the shop to set the radius around the star. This allowed me to set the point of the stripe to match the relative point of the first stripe. Once that stripe was mounted I just had to split the distance between the other two stripes. Again, I set the point relative to the other two and mounted the stripe.


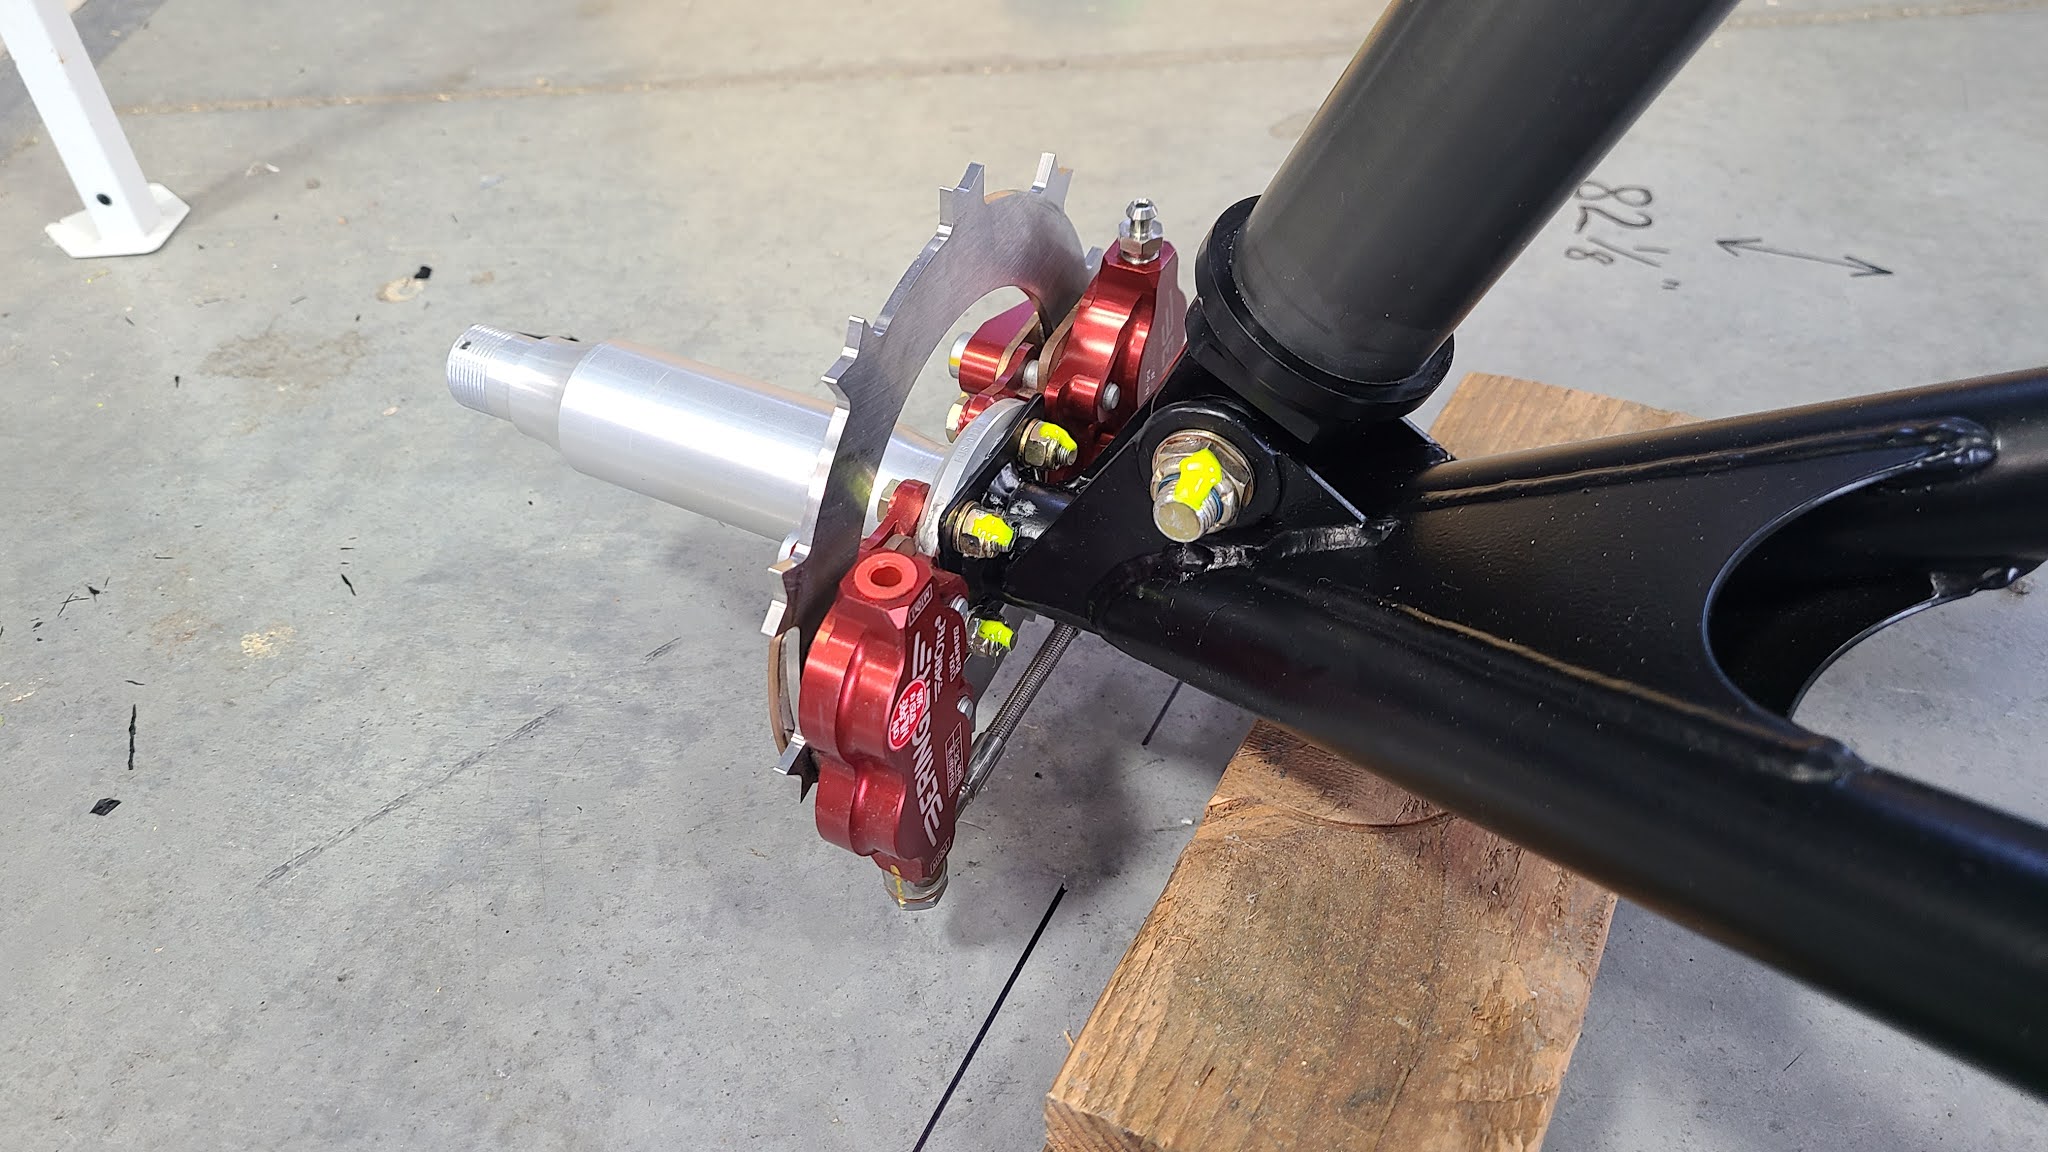
I finished up mounting the main landing gear today. I started by mounting the shocks. Once they were all fitted I put some thread locker on the rod end jam nuts. Then I started applying grease on all the connections and tightened them. Next up was the Beringer Brakes, I mounted them after coating the axle with anti-seize. Torque seal was applied to all the nuts.


I lifted the plane with my engine hoist so I could mount the tires. Once the tires were on, I filled the shocks with a small amount of nitrogen to level the stance and take the squat out of the gear. It's now back on the gear. Now to clean the shop up and make room for mounting the wings.


