Wednesday, June 30, 2021

Skylight Finished

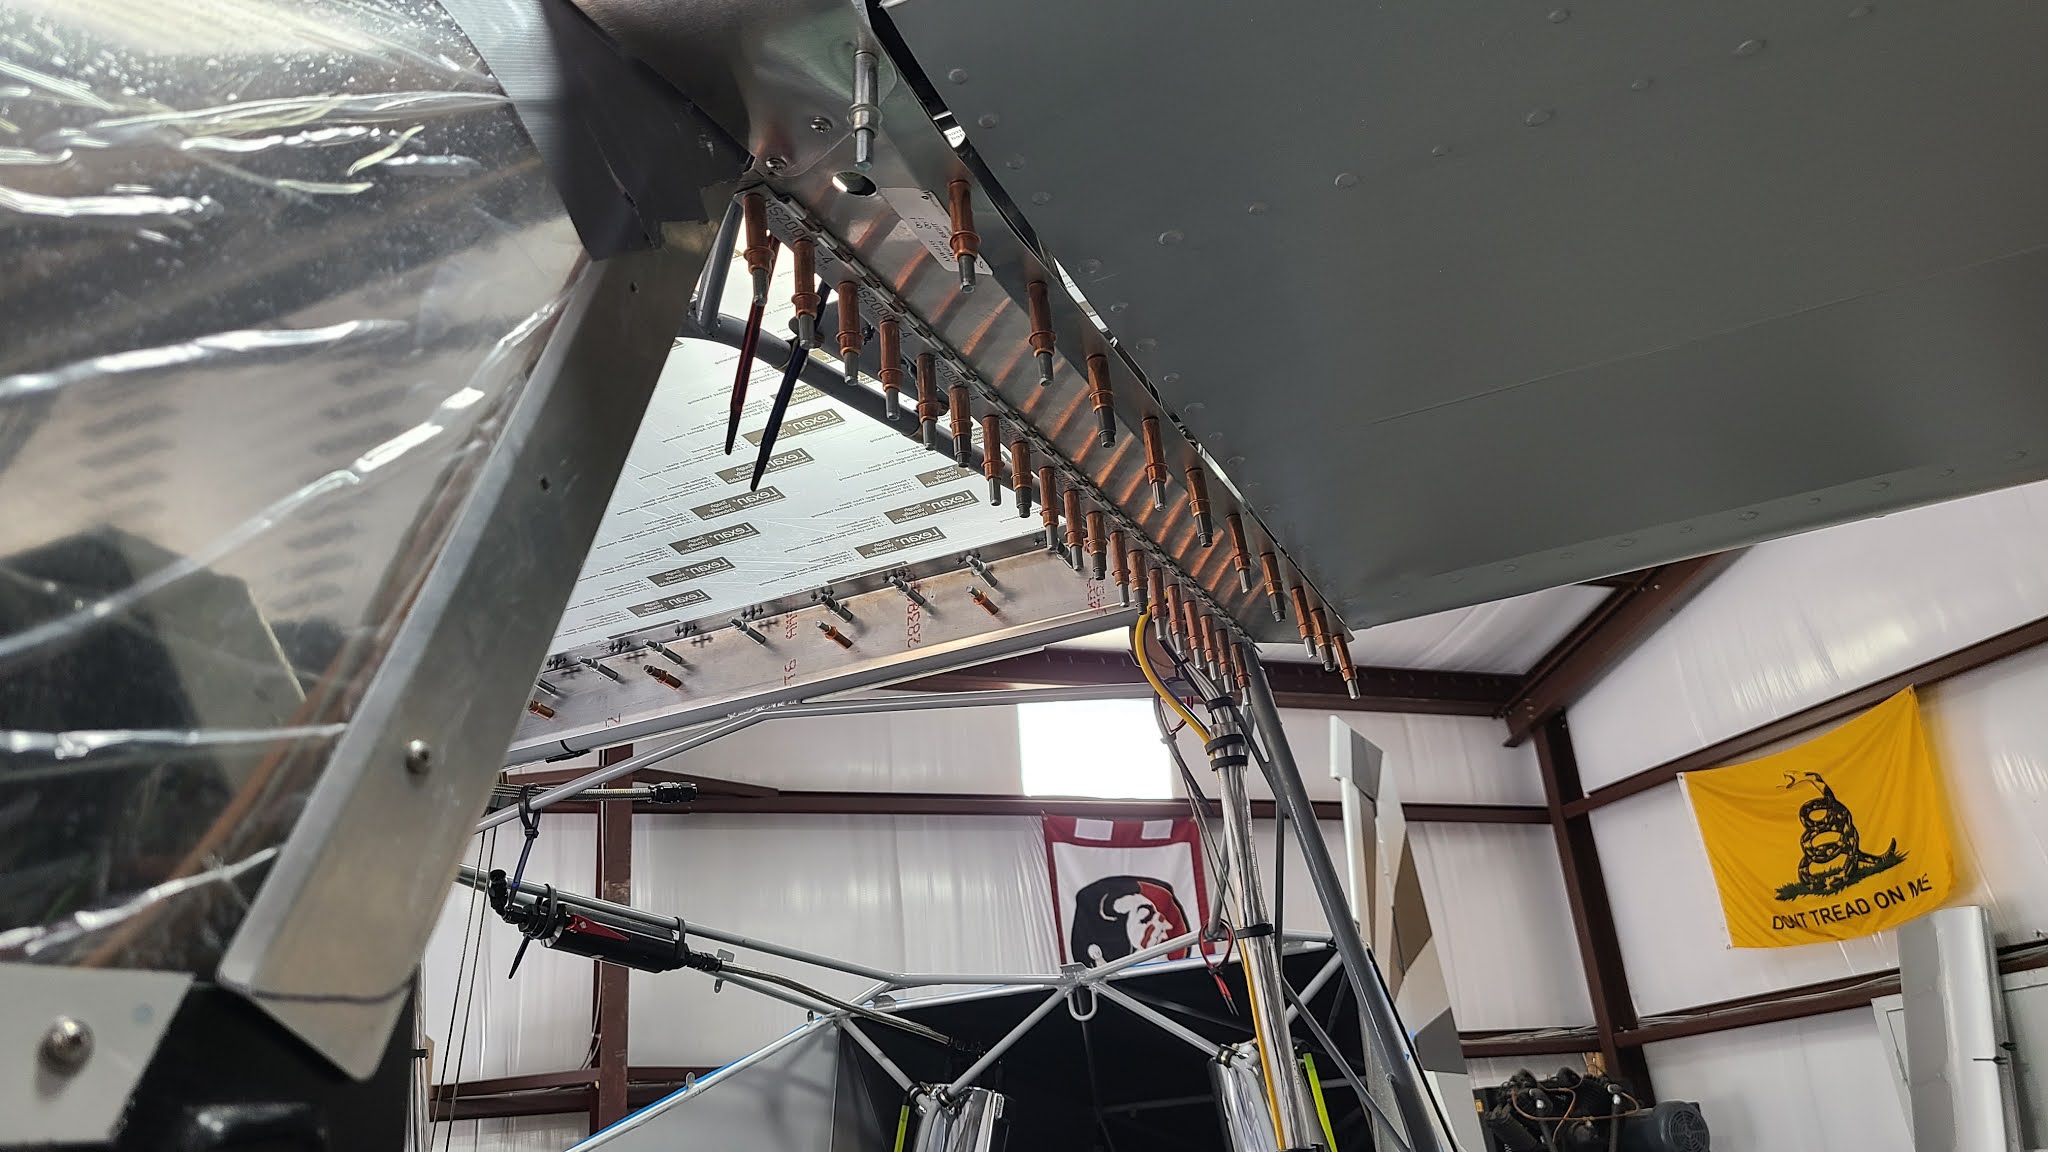
I picked up the Lexan skylight from the tint shop a few days ago and let it cure before installing it. Today, I finished up re-installing the skylight after smoothing the edges a bit. I also had to re-install the GPS pucks/trays/brackets, and the COMM antennas. Everything went back together nicely and without issue. There are no light leaks as the tint covers beyond each side and makes for a really nice look.

The tint is the current state of the art, top of the heap tint from 3M. It blocks 99.9% of UV, 97% of IR (Infrared which is felt heat). So this should be really nice on hot days, or any day when the sun is beating down. I've left the top (outside) protective film on for now to keep protecting it while I finish the plane up.

I had the Adel clamps and the GPS trays powder coated gray to match the interior frame work and I think it came out really nice.

Tuesday, June 29, 2021

Wing Close Outs

I picked up the left wing close out that had to be re-powder coated this morning along with the GPS puck trays and clamps. I finished installing the close outs and upper door hinge on both sides this evening. You can also see the new extra long (4") wing pins with keepers installed. I have the hinge pins in place just so I don't miss place them, lol. 

Tomorrow the Lexan skylight goes on with the antenna mounts.

Sunday, June 27, 2021

Head Rack Continued

Yesterday, I decided to paint the speaker bezels to match with the satin black. With those now dry, I installed the speakers back into the front head rack bracket this morning. I also mounted the zip tie wire keepers for the speaker wires. Then I permanently mounted the assembly back into the aircraft. Once installed, I zip tied the wires and connected them back up.

I then installed the remaining four C-Clips on the flap down tube bushings behind the door braces. I'd been meaning to do this for some time, just finally got it done. I then installed the call sign letters to the dash and the tank cover labels to the covers. Lastly, I installed the right butt rib and have to wait for the closeout to be re-powder coated before finishing that side.

Saturday, June 26, 2021

Head Rack

I received all the head rack parts back from powder coat and started assembling them back on the plane. I applied the required "EXPERIMENTAL" vinyl lettering on the rear cross member before riveting it in place. Unfortunately, the right wing closeout was messed up and needs to be redone. I also ordered longer wing pins so they would extend beyond the wing closeout so I could put a keeper on it.


Thursday, June 24, 2021

Fuel Plumbing

Back to working on the fuel plumbing. I bent up some fuel line and installed some fittings to connect the fuel pumps to the 100 micron filter and from the Andair fuel selector to the fuel pump. It took several attempts to get the fuel selector to pump correct. It's getting tight in there but will work and allow me to keep the under seat storage bins. I'll have to rework the mounting tray to get it all mounted correctly. I'll also have to tweak some of the lines so nothing is touching, but it fits. Now to complete the rest of it to the firewall.

Edge Performance dual pumps
100 Micron stainless cleanable/replaceable fuel filter
Connection from fuel selector to fuel pump
I'll have to tweak these lines to make sure they don't make contact. You can see the output of the fuel filter at the center top of the pic.

Thursday, June 17, 2021

Head Rack Disassembly for Powder Coat

This morning I was eager to start taking everything apart for powder coat. This was a pretty big job as there are a lot of pieces to take apart. After a while, the heat started building making for an uncomfortable time. Once the parts were all removed, I had to spend some quality time deburring/filing/sanding/cleaning everything and then segregating it into two boxes, one for the gray parts and the other for the matte black parts. Unfortunately, after several hours at 105+ I threw in the towel, I'll finish tomorrow morning when it's in the 90's.

I'll begin work on the glare shield that goes from the top of the panel to the firewall, covering all the electronics. This needs to be finished before the windshield can be permanently mounted. I'll have to make some small pieces that will serve as ledges for the front of the glare shield to set on by the firewall. These pieces will be riveted to the fiberglass former. The lock plates are already installed in the top of the panel to secure the glare shield when installed.

Wednesday, June 16, 2021

Wing Closeouts and Root Cuffs

This AM, I continued on with the wing closeouts, I finished the left side by drilling for the hinge.

I also continued with the root cuffs and got them done. I installed all the lock plates except for the two forward most ones on each side. These will be installed after the powder coat as they capture two pieces in a sandwich fashion. All the holes and dimples are already done so it will be a matter of setting rivets to complete the task.

Everything installed in a final test fit before disassembly for powder coat.

The holes for the wing pins are drilled and the cap strip installed.

Final edge sanding was completed insuring that neither the wing or the slat touch the boot rib/cuff/cap strip when closed. Ready for disassembly...


Monday, June 14, 2021

Wing Closeouts

The HEAT is back, 115 today. I started a 5:15AM  this morning, I cut the door hinge for the right door and clamped it into place. I then measured it and came up with an acceptable rivet pattern. I installed the wing closeout with the hinge in place and clamped it all. Once I was happy with the position of everything I began drilling for the rivets. As usual, the #40 bit first with the silver clecos. Followed up with the #30 bit and copper clecos. 

I ran out of the CCC-32 rivets for lock plates and they are on back order. Fortunately, Paul had some and graciously lent me 20 so I can finish this up. Thank you Paul! I have a couple of lock plates left to install and this side will be done. At this point everything comes back apart and gets deburred/sanded/cleaned and ready for powder coat.


Saturday, June 12, 2021

Wing Root Cuffs and Cap Strip

I continued on fabricating the wing root cuffs today. I finished up the fitting of the left cuff and match drilled most of the holes in the cap strip. I also drilled the access holes for the wing pin on the left side. I will have to get new wing pins as these are too short to be able to put a clevis pin in when they are installed. The pin will have to stick out below the close out on the bottom to be able to access it with a pin.

I filed the root cuff to give the slat some room when closed.

I have to match drill the pin holes on the cap strip and the root cuff. There is a little overlap and they're not centered on each other.

Only thing left is to install the lock plates and screws.

The wing pin is too short, it will have to be longer and stick through the hole in the bottom close out.

Getting ready to reinstall the right butt rib and begin work on fitting the right cuff. I just used the left cuff as a template for the right cuff. Drew a line around it with a marker and cut it out on the band saw. Then just flipped it. I left it a little long in the dimensions so I could trim it to fit.

Starting on the right root cuff. A screw head snapped off on the top middle position when screwing it in place after match drilling the hole in the cuff. So, I'll have to pull the entire front head rack piece so I can replace the lock plate. That will be easier than trying to drill the screw out of the lock plate. Also less chance of screwing something else up while attempting a fix.


Thursday, June 10, 2021

Wing Root Cuffs and Windshield/Skylight Cap Strip

This afternoon I started on the wing root cuffs. I had the factory cuffs but they were made for the standard windshield not the extreme windshield. So, this required making new cuffs. I started with a piece of card stock to get me close and then transferred it to .020 aluminum. I laid down several strips of gorilla tape for protection of the Acrylic. Quite a bit of fitting/trimming/sanding was required for a good fit. I then drilled the screw holes along the top edge and then bent the cuff around the bottom of the wing and clamped it in place while I drilled/cleco'd it in place. On to the other side tomorrow.


On a whim while out running an errand, I decided to stop by my local welder to see if he had a 48" shear and brake. Turns out he did, fantastic! I needed it to cut/bend a piece of .032 aluminum for the cap strip for the windshield/skylight. This was the last piece needed to complete the head rack. So, I had him cut/bend the piece for me. I will drill the screw holes tomorrow to finish the piece.