Tuesday, August 20, 2019

Garmin Heated/Regulated Pitot

I re-purposed an extra Garmin Servo mount I had to make a mount for my Pitot tube. I installed the pitot tube according to the Garmin Installation Manual. They were very particular in the placement of the tube:
1. It had to be no further back than the 25% cord line of the wing.
2. Could be no farther forward than 2" ahead of the leading edge.
3. It had to be within +-5 degrees from the chord line of the wing.
4. It had to be within +-5 degrees of the center line of the aircraft.

The first two pics are of the bracket with a servo mounted in it for reference.
I cut the mount down in size to save weight and make it fit more snuggly in the wing. I had to drill out and file the oval hole for the pitot bracket to fit through. Once that was completed I drilled the holes for the screws to pass through.
I had to install the lock plates in the bracket before mounting it.
The bracket is held in the mount with four 8-32 screws.


Wednesday, August 7, 2019

MOD - Under Wing Lights

Today, I continued working on the under wing lights.

I finished making the other five brackets. Then I clamped a long level  and a piece of angle bracket spanning several ribs to set a bottom extent for the bracket. I set the bracket on top of the level and clamped it in place to drill the rivet holes. Got the first bracket cleco'd in place and removed everything to check positioning.

Tuesday, August 6, 2019

MOD - Under Wing Lights

Another idea that I thought would be nice to have. Under Wing Lights. Accomplished by placing three or more small LED lights facing to the ground on the bottom of each side of the wings. These would be run off a switch so one could illuminate the ground around the plane when desired. These LED's don't draw much current at all. I can see using these when plane camping or even needing to see the tie downs at an airport after dark. All in, they don't add much more than a ounce or two. Worth it for the convenience.

So the pics show my super simple prototype mount. I made it large enough to double as a fabric plate too. This give the fabric a sufficient surface to attach to around the light socket. The LED's come with a rubber grommet that makes a weather proof seal when installed and the lights themselves are waterproof too.

At this point, I plan to Hysol and rivet the brackets to the ribs making sure they are absolutely flush with the bottom of the ribs. I will fill the seam between the bracket and rib with Super Fill and sand smooth so once the fabric is applied, the seam will not show. I will also use waterproof connectors on each light so I will be able to replace them if needed.

Saturday, August 3, 2019

AEROLED Pulsar NSP Install

Progress is slow during the heat of summer. I try to catch up on other stuff when it's hot, so not much going on in the shop.

However, I did get one of the AEROLED Pulsar NSP (Nav, Strobe, Position) wing tip lights temporarily installed today. After thinking about how it needed to be mounted with maintenance in mind, I mocked up a paper template and drilled some holes. Had to make a trip to Ace for some mounting screws and then got it temped in place.

The three considerations for mounting the light were:
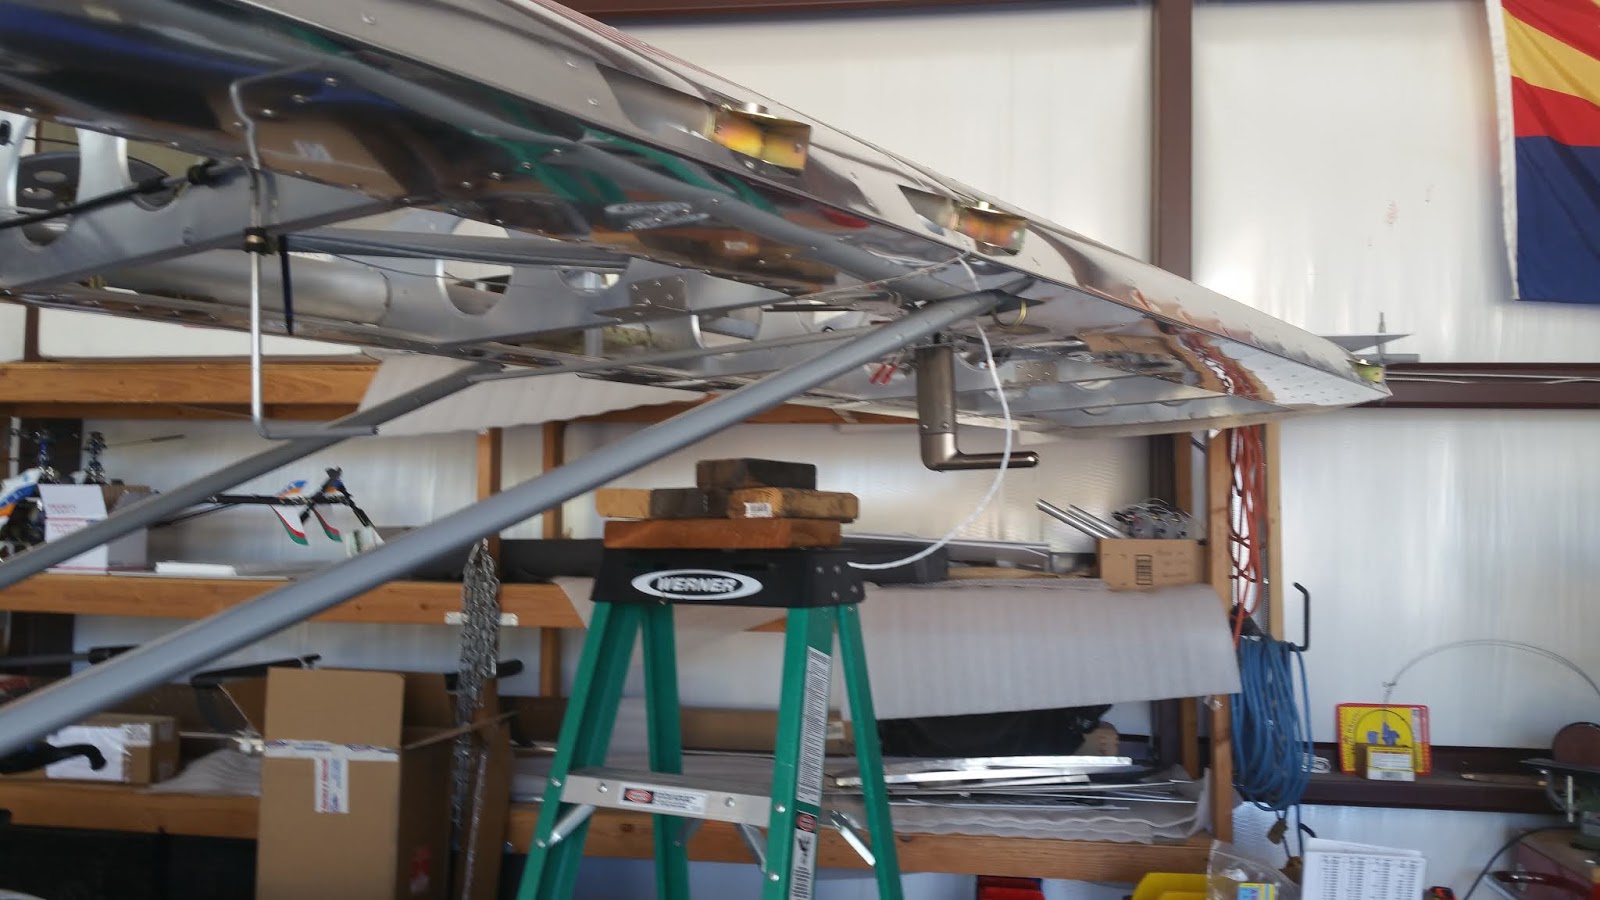
1. Since I would be using lock plates, to have enough room for them to clear the outboard rib when the tip was mounted in place. This was accomplished by installing the light mounting bracket in line with the outer rib lightening hole as shown in the pics. I've chosen to install lock plates to accept the 6-32 screws instead of just bolting the bracket in place because it's easier to remove once the lock plates are installed and there aren't any nuts or washers to keep track of.

2. The basic alignment of the light on the wing tip. Making it level when the aircraft is in a level attitude. This required leveling the fuselage header rack then leveling the light.

3. Thinking about maintenance, I wanted to be able to remove the wing tip for inspection purposes without having to remove the light itself. This required the mount to be installed only in the wing tip and not be attached to the outboard rib. To do this required aligning the mount with the rib lightening hole as previously discussed.