
First off, I realize this is not the most accurate method to use and ideally, this should be done on a lathe. However, this push rod is not a rotating piece, just a push rod, so extreme accuracy is not required as it does not rotate. I did take care to align it as best I could and it came out very close.
Second, the push rod blank that was supplied with the Garmin Servo kit was not large enough to drill for a 1/4x28 aurora bearing. The Garmin kit came with a 10-32 bearing, the elevator bell crank has 1/4x28 bearings and would require another 1/4x28 bearing to mate up with the push rod. So, I needed a large enough aluminum rod to drill for 1/4x28 threads. I matched the size of the elevator push rod and purchased a ½” diameter aluminum rod. It came in a 36" length which I cut down to 8" for the push rod.
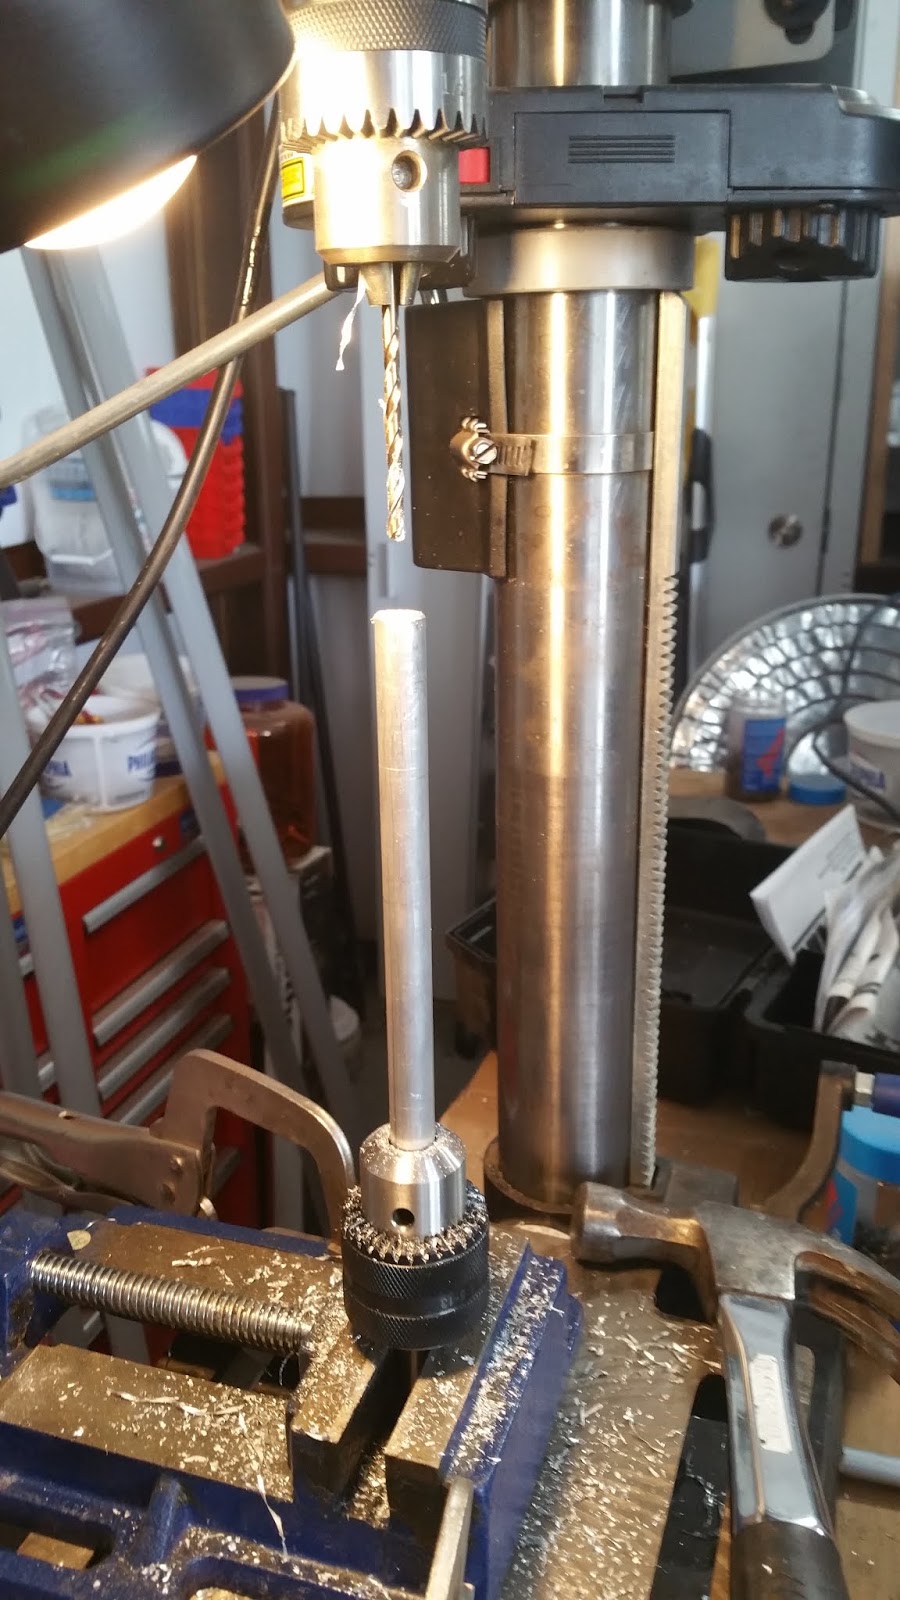
I used a lathe chuck to center the rod on my drill press. Inserted the centering bit in the drill press and began the drilling operation. Once a centered hole of sufficient size was started, I switched to the #21 bit required for the 10-32 tap. I drilled the hole to the appropriate depth for the 10-32 aurora bearing.
Once finished, I flipped the rod to drill the other end for the ¼ x 28 aurora bearing. Again, I began with the centering drill bit to start the hole and finished with the #3 bit. I then tapped the hole with the 1/4x28 tap, then tapped the other end with the 10-32 tap. I test fit each aurora bearing to ensure proper depth and fit.

Once both aurora bearings were installed, I installed the 1/4x28
end of push rod assembly on the elevator bell crank and the 10-32 end on the
servo arm. This allowed me to position the servo on the tray.
I marked and drilled four holes for (4) AN3-4 bolts. I installed the four bolts with (4)
AN960-10 washers and temporary stainless nuts. I will replace the stainless
nuts with AN Lock Nuts during final assembly.


