Saturday, November 7, 2020

Door Trim, Radio Stack, Cabin Lights and Detail Painting

I mounted the outside pieces of the door jambs to complete them today. Before mounting them I needed to install rivnuts on the remaining tabs outlining the chin windows. The door trim needed to be mounted before I could mount the landing gear because they frame the shock mount for the gear. I used a bit of Hysol to attach them to the frame. I riveted the trim pieces together and used screws to hold the pieces tight while the Hysol set up.


The next project for the day was to fix the issue with the radio stack. My support brace for the radio stack covered a slot that is required for the GTR 200 radio.

So, I needed to remove the brace and cut a slot in it to match the slot in the radio tray. I marked the slot with a fine point marker before disassembly and then used my band saw to cut the slot. Then did the other side. It worked out well.

 I was able to insert the tabbed piece into the slots as required.

The GMA 245 audio panel and GTR 200 radio plugs and back plates installed.

Another shot of the slot and back plates installed.

Next up was to reinstall the LED lighting for the cabin. It was pretty straight forward after cleaning the truss with some Acetone. Got them lined up and stuck down pretty good. I hooked them up and tested the switch, it works! They don't throw an immense amount of light but when it's dark they'll be awesome!

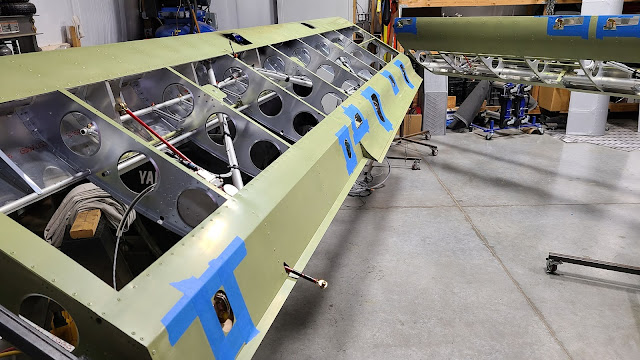
Last project for the day was to paint the wing openings. I worked on taping, hanging plastic and cutting up pieces of construction paper to protect cables and other items I didn't want to paint. A slow process but I got most of one wing done. I did part of the other wing yesterday.  I'll finish up tomorrow, then it's time to start gluing the wings for covering.


Friday, November 6, 2020

Wiring Update

Work continues on the wiring. Today Chris got the GMA245 Audio Panel and GTR200 radio connections completed. We're at a point where the wings need to be reinstalled to continue the wiring. So, I need to get them covered.

Although it looks like a hot mess right now it's actually pretty organized. Of course, all the tidying up will come after everything is hooked up and tested. Then it will get all laced up nice, tight, and pretty.

I have to disassemble my bracket on the side of the radio stack and make a couple of notches in it because it is interfering with the radio bracket you see in the middle of the pic. Once that modification is complete the brackets can be installed and then the GMA 245 audio panel and the GTR200 radio can be installed. The GMC 507 auto pilot plug was previously completed. That leaves the GNX 375 navigator/transponder plug, the two G3X displays, the engine firewall forward, and the VPX Electronic circuits to complete.About 2/3 complete.

All the switches are wired, the hot bus is complete and functioning (this runs the interior lights, two sets of cargo lights, rear fuselage inspection lights, the 12v plug, the four USB plugs, the two dimmers; switch lights and under wing flood lights. The stick grip switches are wired as well.


Wednesday, November 4, 2020

Header Tanks

I temporarily installed the header tanks to check fitment. I last had these installed before I covered the fuselage. I wanted to check for clearance and to see if the hoses need adjustment. They do.


Tuesday, November 3, 2020

Engine Update

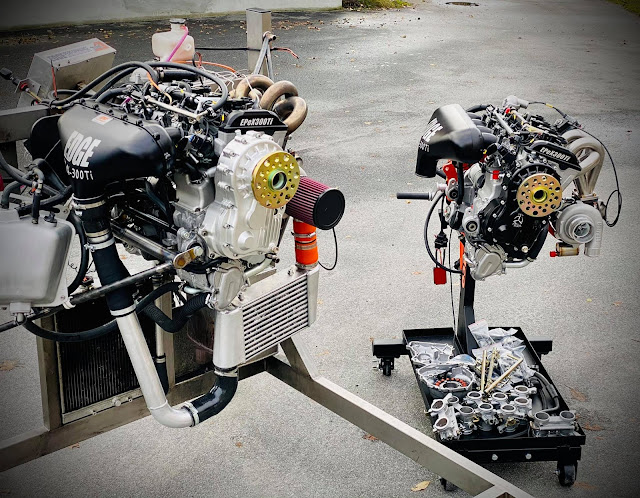
Received a couple of pics of the engine. Build is complete, just waiting for the break-in run video. It is supposed to be run Friday, weather permitting.


 Steve Henry's engine hooked up on the test stand with my engine on deck in the back ground.


 My engine hooked up on the test stand waiting to run

 A short video...


Fabric Patch Repair

I finally got around to finishing my fabric repair job on the bottom of the fuselage. I received the Oratex 600 sample from Better Aircraft Fabric. I am using the 600 because it is much thinner and lighter than the 6000 fabric. Since I'm just covering over the 6000 on the fuselage I don't need to worry about strength. 

First step was to cut the patch to size then glue the patch and the area on the fuselage.

The patch applied with low heat. 130 degrees
The patch after running the iron over it at 320 degrees.
No too bad. One can see the area if you look close but definitely acceptable considering what it looked like. I haven't applied the finishing tape on the front center section yet. I put a little glue down to help the tape adhesion.

Just a reminder what I started with on this...


Friday, October 23, 2020

Covering - Ailerons

Started working on the ailerons today. Same process as the flaps, just smaller. Cut the fabric and lay out the glue lines.

I did both tops at the same time.
Same strategy, tops first to put the seam on the top so the wing will hide it.

Trimmed the slots.
Tops done.
Starting the bottoms...
Gluing the fabric

Tried to fold the upper part over the side without success. Had to pull it off which left some glue issues. I ended up sanding most of the glue flat and re applied it. Folded the bottom up without issue.


Reinforcing tapes applied and holes burned for rivets.

Finish tapes applied.
Bottom finish tapes.
Top done.
Sea plane grommets installed.


Flaps and ailerons ready to install. It's an optical illusion, both flaps are the same size, one is further back than the other. Both ailerons are there to...