Friday, April 30, 2021

Wing Closeouts, Passenger Door, Windshield A Pillar Covers

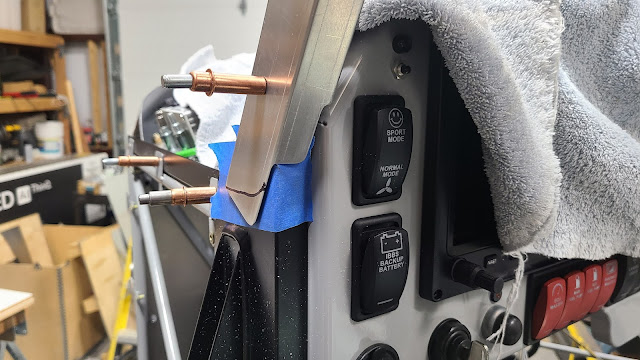
I started the day carving up the A Pillar Covers to fit around the extended panel. Got them fitted, drilled and cleco'd. 


Cut to clear the weld at the top.

After getting the A Pillars cleco'd in place I placed the door frame in and realized it was too big. So, I'll need to do some surgery on it to get it to fit correctly.

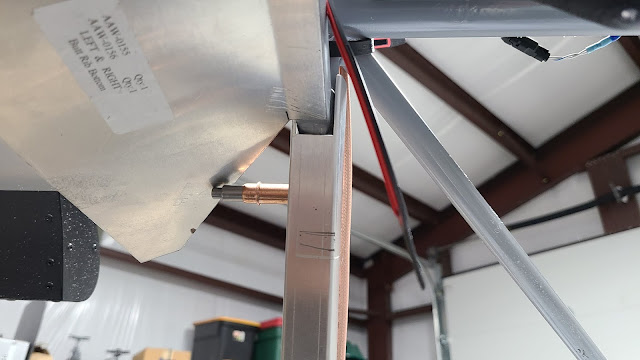
The last project for today was drilling and cleco'ing the wing closeout on the passenger side, the wing side of the closeout. I have a bit of trimming on the leading edge end of the closeout. I have to get the door finished before I set the hinge where the clamps are. The other side tomorrow...


Tuesday, April 27, 2021

Skylight

I've been working on the skylight and brackets for the past few days. I finally have the skylight all cleco'd in place. There is a lot of trimming to do yet but the basic piece is in place. I'll be installing all the lock plates for the screws that will hold the skylight in place today. Unfortunately, I need to fabricate some new antenna plates. Well, I don't have to, the ones I have will work fine, I just want to make them a bit bigger to include another screw in the bracket to hold them. It will make them more secure and being a bit bigger will help the electrical ground plane too.

I made up my new antenna mount plates. The same as the old ones, just wider.

Started working on the under wing closeouts. They are a flat strip of aluminum cut to shape that goes between the door hinge area and the butt rib. It closes the gap between the wing and fuselage. The raw pieces are provided in the kit but they need to be custom bent, trimmed and fitted. Here's the right side after some trimming and the two bends. The bends are arts & crafts, eye ball bends. Keep trying until you get the right fit.

Left wing preliminary bend on the fuselage side. Ready for the wing bend.

Looking across the cabin to the right side

After several shots at trimming here is the 1/8th inch gap I'm looking for.

Tomorrow, I'll finish up the left side bends and trimming. Then the drilling starts...

Friday, April 23, 2021

Panel, Skylight

I updated the firmware and databases for the panel today. All went well, without a hitch. It took a few hours to download the files, figure out the procedure, and install them, but it went smoothly. Next updates will be a snap.

I also got a little work done on the "new" skylight/windshield/speaker bracket. I drilled, dimpled and cleco'd the top plate to the bottom bracket. Tomorrow, I have to install the lock plates in the holes between the cleco's and then I can rivet all the pieces together. Then it will be ready for powder coat.

Thursday, April 22, 2021

Panel - IT WORKS!


Smoke check complete! It works as it should. Now to learn the system and start programming.

Wednesday, April 21, 2021

Brake Lines Continued, SkyLight Brackets, Comm Antenna Mounts, Wiring Continued

I started the day undoing the Adele Clamps for the brake lines that I did yesterday. I purchased some 1/4" ID rubber fuel line to use as the correct size cushions for the brake lines along the gear legs and installed them. I held everything in place with Grip Lock Ties. I also cut a couple of short lengths to cushion the brake lines under the welds at the center of the legs.

Next project, I needed to mount the Comm Antennas so Chris could finish wiring them. This required that I complete the design of the rear skylight bracket. This bracket is the mounting plate for the skylight and the forward mount of the turtle deck (rear window). The factory bracket has both the skylight and turtle deck overlap and screwed together. Since I wish to fold the wings on a regular basis, the turtle deck has to be removed each time before the wings can be folded. So, coming up with a way to mount the turtle deck without requiring screws across the top edge as they would be hard to reach without a step ladder. The following is what I came up with.

After getting the basics of the bracket together, I was able to mount the Comm Antenna brackets (previously fabricated). 

While I was fabricating and mounting the antennas, Chris was busy terminating the grounds for the panel. Almost finished, only a few more left to go...

I also had Chris add a charge port for the Earth-X battery to make it a snap to charge (the Orange Plug)

I received a part today that converts the push on connector for the fuel injector to an AN-6 screw on connector that allows me to use PTFE braided stainless line for the fuel line rather than standard rubber fuel line.