Tuesday, December 15, 2020

Wing Inspection Rings

I received my ultra fine tips for the super glue today and used them to finish off the rings. After the glue set I was able to cut out all of them out. Talk about counter intuitive, something not right about cutting holes in perfectly good wing covering. Anyway, it had to be done and it came out just fine. It looks like a lot of holes and it is, but I had to add a couple of extra to each wing because of lights and some of the electronics installed in the wing.

I installed a inspection cover to see how it would fit and look. Not bad at all. I did have them all powder coated matte black instead of trying to match the silver Oratex. I like it.
Another view...
As a result, I was able to connect up all the under wing lights, the OAT (Outside Air-temp Probe),
and install a couple of washers in the Pitot Tube bracket to get it to sit level.
I also put another couple of coats of John's 360 Avenger Ceramic Coating on the fuselage. Nothing to really show here, it's a clear coating that makes the fabric really slick so nothing really sticks to it. I've heard really good things about it, I hope they're all true. We'll see. I'll be doing the wings tomorrow.


Saturday, December 12, 2020

Wing Inspection Rings, LED Flood Lights & Taxi Camera

After a few days off I got back to work and installed the inspection rings on the bottom of both wings. The factory calls for 19 rings on the left wing and 17 on the right. Because I have 3 LED flood lights installed on each wing, they required two additional rings per wing. So the left wing has 21 rings and the right has 19.

 Left Wing Bottom

Left Wing Bottom with LED Flood Lights Installed

 Right wing bottom with Rings and LED flood lights installed

 Left wing

 Right wing

The rings are glued on with Super Glue. It's not easy getting a perfect edge to edge seal of glue so I will have to come back and wick glue from both sides to get even coverage. However, I need some micro glue tips to do it correctly, They are en-route from Amazon expected Mon. I'll finish up with gluing the rings, let them cure and then will cutout the fabric centers allowing access to inspect the inside of the wings. I already have the inspection covers powder coated and ready to install.

The LED Flood Lights were made up many months ago and have been waiting to be installed. They will allow me to turn on some lights to illuminate the ramp area or camp site should I need some light.  Plugs are installed on the ends and Chris installed the mates in the wings some time ago. Now that they are installed in the wings I will hook them up once the inspection ports next to them are cut open.

Last task today was to make a mount for the Taxi Camera. I purchased a vehicle backup camera for this purpose. It will allow me to display a video image on my G3X displays showing what's in front of the plane when in a three point stance. I will use this to clear the area in front of the plane before starting the engine. The camera I purchased has 720p resolution, a 170 degree field of view, is full color and should provide a nice view of the immediate area in front of the aircraft. 
 
Since I already made a mount for the Taxi Light and GoPro Camera, I wanted to see if I could add this camera to it without too much trouble. I think it worked out pretty good, not very aerodynamic but it will work. I will have the small part powder coated to match. This whole thing mounts to the gear attach point on the center line of the fuselage. In the pics, it looks as though it might block some of the taxi light but the light will be pointed more downward because of the three point stance of the aircraft when taxiing. I;m also not sure if the GoPro will pick up the top of the bracket in its view. I'll have to see how it all works in practice once installed.

Sunday, December 6, 2020

Covering, Left Wing

I started the day by doing the final shrink on the entire wing. I did the bottom of the wing first, then flipped it and did the top. It shrunk up nice a tight.

Next, I needed to undo a mistake from yesterday. I got ahead of my self and put the leading edge finishing tapes on and forgot to pre-glue the area before hand. The tapes are a peel and stick affair, but to get them to stick down around the rivet heads, the addition of regular fabric glue is necessary. So, as a result the tapes weren't sticking around the rivet heads when I did my detail work leaving what looked like air pockets around the heads. Ugly. Once I realized my mistake, I quit for the evening. I had been working all day anyway and was tired.

This morning, I wasn't sure if I would be able to remove the tapes and decided to give the smallest tape a try. I used the heat gun and picked a corner up with my finger nail and slowly peeled it off. It left a little glue residue, but peeled off nicely. So, I went for it and peeled them all off to start over. After getting them all off, I used some Acetone to remove the glue residue. Back to square one, I glued the area around all the rivet heads and the seam that the finish tapes are meant to cover. I then cut new tapes and started applying them. Perfect.

Next up was to install the fabric rivets on all the ribs, about 42 per side. 


Once those were installed I wiped them down and the 2 inch width around the ribs with Acetone. Then I applied glue down the rib edges using a one inch brush making sure the rivet heads had plenty of glue around them for the tapes. After the glue dried, it was time to cut the tapes and apply them. After the tapes were down I used the Toko iron set to 145C to go over the edges of all the tapes.


With the exception of a couple of finishing tapes to be put on the tail feathers, covering is finished on the plane. All that's left on the wings is to install sea plane grommets on the trailing edge to allow water to escape from the wing, and to install inspection covers on the bottom of each wing, about 20 per wing.


Saturday, December 5, 2020

Covering, Left Wing

Today I intended to finish the covering but didn't quite make it. I started with the detail work on the rivets, I finished all of the rivets on the leading edge and the top most rivets on the trailing edge. 

Finished the trailing edge and cutout all the access holes.


 Finished the root end.

Finished the wing tip end.

Finished the leading edge.


 Applied the finishing tape.

Cutout the light holes and finished the detail work.

Tomorrow, first thing is to final shrink the entire wing. Then, I'll finish the wing by burning the fabric rivet holes in each rib and install the rivets and finishing tapes.


Friday, December 4, 2020

Covering, Left Wing

I finished tidying up the left wing today by installing the Garmin GAP26 AOA/Pitot tube. I had to connect all the wires and the AOA/Pitot air tubes. I had previously routed the air lines through the wing and needed to reverse them to match up with the GAP26 unit. The AOA line is blue and the pitot line is yellow. New zip ties were needed along with more Rescue Tape. I had to make a standoff for the aluminum tubes so they wouldn't make contact. I used a bit of rubber fuel tubing and a zip tie to lock them together. The Rescue Tape was used to bind the wiring together and provide a cushion underneath the rubber fuel tubing, then a grip lock tie around all of it to secure it to the wing brace. Not the most elegant but secure.

Once I got everything secured it was time for fabric. Yesterday, I laid the fabric out and cut the hole for the GAP26. I was able to slide the fabric over the pitot tube and down onto the wing without issue. The pitot is unsecured in these photos, no mounting screws. That's the reason it looks to be at an odd angle. I needed to get the fabric down and then I could burn the screw holes and install them.

It turned out really well and allowed me to tack the fabric around the pitot tube area first and work out from there in opposite directions. I slowly worked my way around the perimeter of the wing until it was completely tacked down. Then I used the iron to take out any wrinkles and shrink the fabric in the sheet metal areas.

Once I had it all tacked down, I burned the mounting holes for the pitot tube and installed the screws. It looks pretty good. I'll probably use a very small bead of silicone around the edge to seal it when I'm all done.

I'll finish up with the fabric tomorrow and will final shrink the entire wing on Sunday.


Thursday, December 3, 2020

Covering, Left Wing

I accomplished several tasks today on tidying up the left wing before covering.

1. Torque sealed the spoiler nuts & bolts.

2. Safety wired the flap turnbuckle. I sniped the zip ties the factory used to hold the pieces in place. Again, I used the EAA preferred method of safety wiring turnbuckles on Control Cables.

3. Laced the Nav Light wire using the same technique as I employed on the right wing. I drilled small holes in the bracket and rib for the lacing to attach to. I used a couple of pieces of Rescue Tape for cushion and laced the wire in place.

4. Installed the aileron push rod.

5. Took pics and video of the entire wing showing its current state before covering.


Wednesday, December 2, 2020

Engine, Delivery - Yay!

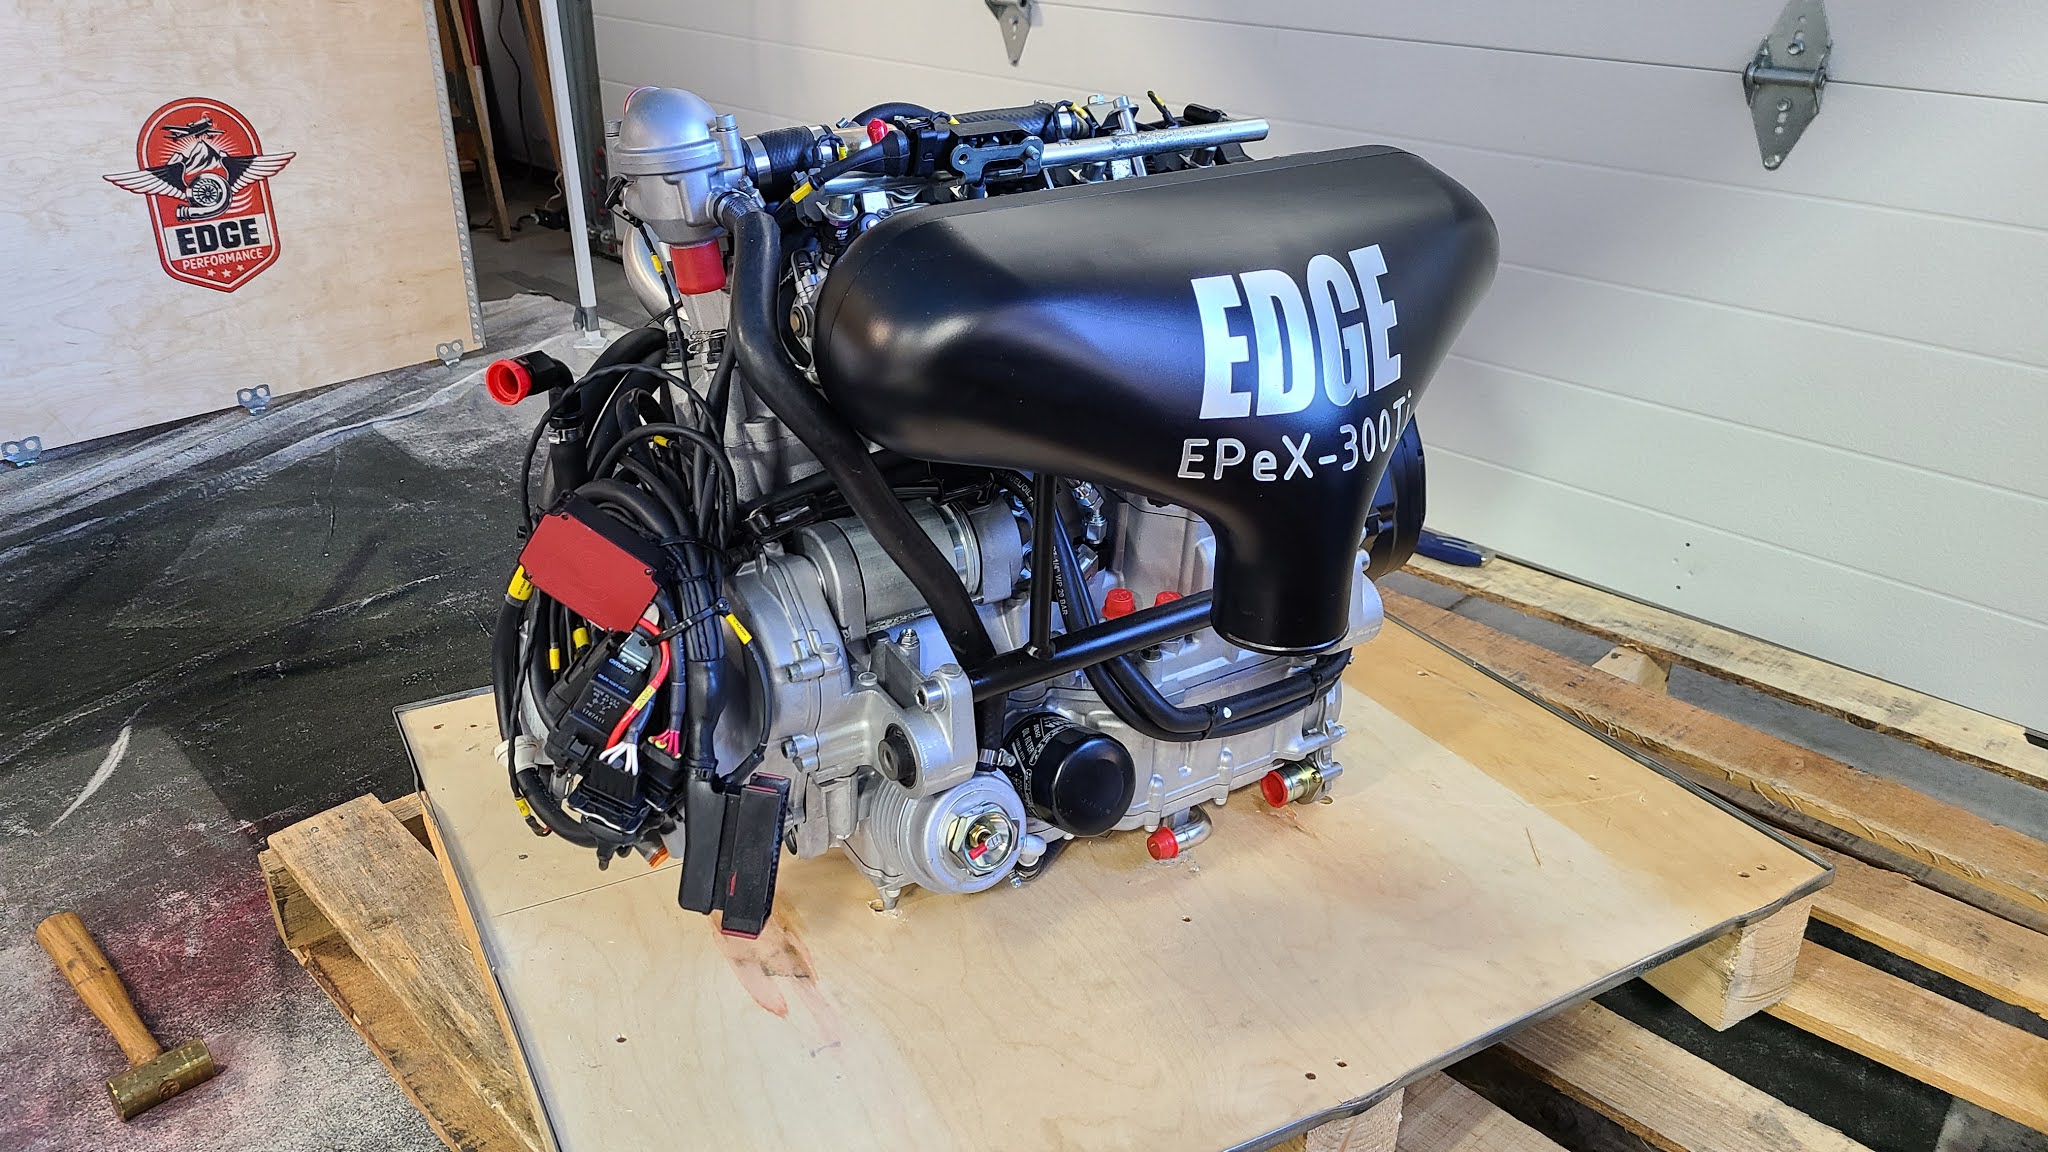
Well the engine finally arrived! Was supposed to be here yesterday, but showed up today. Looks like it made it from Norway just fine.
 

After unboxing...