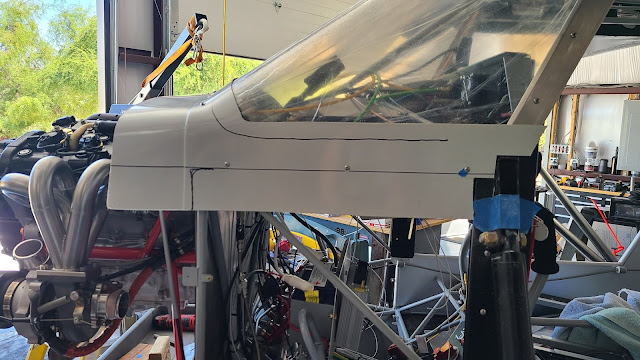
I started trimming the boot cowl today. I'll have a lot of sanding and finishing to do. Then I can start fitting the upper and lower cowl.
Monday, May 31, 2021
Sunday, May 30, 2021
Boot Cowl
Slow progress as the heat has returned. Today, I located and drilled the holes in the sides of the boot cowl and started thinking about how to trim the sides.
Friday, May 28, 2021
Extreme Windshield Boot Cowl
I started work on the boot cowl today. First task was to get it to fit as good as I could before drilling any holes. Then I used my hole finder to locate the center hole on the windshield former and drilled the matching hole. I proceeded slowly until all the matching holes were drilled being careful not to change the alignment.
Thursday, May 27, 2021
Comm Antennas
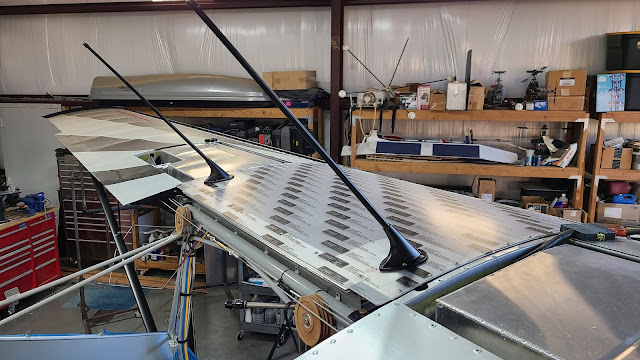
I did some research on painting the comm antennas and found out that you can paint them as long as you don't use paint with metal in it such as metal flake paint. I wasn't happy with the bright white antennas on my silver and black scheme. I wanted to paint them satin black to match. So I did. I used a two part epoxy rattle can.
I think they look a lot better. Oh, and I found out that they are painted a polyurethane white at the factory. After I hooked them back up I turned on the radios and they worked fine. I'll hook a test meter up to them anyway to verify.
Sunday, May 23, 2021
Friday, May 21, 2021
Radiator
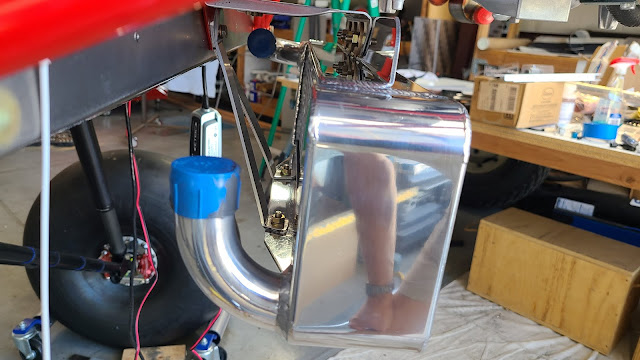
After a conversation with Steve Henry, I started fabricating a bracket for the radiator. Steve gave me measurements and sent a couple of pics of his mount and I started with that. I ended up making a second one out of thicker material (.063 vs. .050) and a little larger (8" vs 7") and am happy with it.
I have bracing to make for it but it is mounted and has plenty of clearance for the hoses.
Thursday, May 20, 2021
Acrylic Extreme Windshield
I trimmed up the windshield using the saw but still have some final sanding to finish the fitment. I had to cut out around the top of the door frame (black piece) as it is Hysol'd in place and the windshield can't fit behind it. I drilled all the holes across the former on the firewall. It all lines up as it should. Nice fit.
Tuesday, May 18, 2021
Acrylic Extreme Windshield and Skylight
I trimmed the rear of the skylight today. I had to wait for a new tool (Milwaukee Cut Off Saw) to arrive and it came yesterday. I purchased it to cut the acrylic windshield but I decided to test it out on the less expensive skylight. It worked like a champ.
Before
Before
After
Turtle Deck Slot
I received my acrylic extreme windshield from Richard Holtz at Aircraft Plastics. It's beautiful! It's already tinted for heat rejection and UV blocking.
I had to toss it on to check it out. It actually fits pretty well out of the box. It will take a bit of fitting but not too bad.
After trimming the top edge and drilling the screw holes.
After the initial pass with the cut off saw. I will sand the remainder until it fits the way I want it.
Once it fits at the firewall correctly, I'll trim the sides to fit and drill the screw holes. Then I'll fit the boot cowl.
Tuesday, May 4, 2021
Wing Closeout, Doors
I finished cutting and fitting the right wing closeout this past weekend. Nothing big to report, went as expected. There is a bit of trimming to do on the leading edge side but that will come later as I cut and fit the wing root cuffs. I need the windshield in place for those.
I previously built the passenger door (many months ago - pre-covering). When I went to fit it for the hinge, I realized that I hadn't taken into consideration the A-Pillar cover I just installed last week. So, the door didn't fit correctly. I also noticed that I didn't have it square to the door opening in the fuselage, meaning that there would be some tweaking necessary to get it square. As a result, I had to rebuild the door. After trying to "fix" it by drilling out some selective rivets, that didn't work, so I drilled them all out and started over.
With sixteen joints and eight aluminum tubes to manage I finally resorted to super glue to "tack" the pieces together. It worked pretty good. If I had to take a joint apart or reposition it, I used my MAP gas hand held torch to heat up the joint and release the super glue. Once I was happy with the fit I set about re-riveting all the pieces together. After riveting a couple of pieces, I would set the door back in place to be sure nothing moved before moving on. Eventually, I finished. Fits much better now but there are a few holes to fill to make it look good.
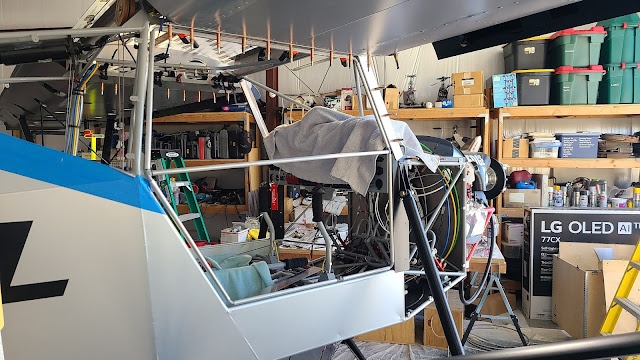
The door is just held in place by spring clamps at the top where the hinge will be, just hanging in place You can see the orange tips of the clamps. There are also a couple of 1/8th inch paint stirs used as spacers for the hinge.
Getting close...
Not quite there...
The final fit.
Looking aft showing how the center piece bows out...
Now starting on the left door, same process but from scratch. I am using the right door as a starting point on the aluminum tube lengths. This should get me real close, but will take some time to get it right.
After this fits correctly, then on to the optional "windows", they are another frame that fits inside the upper portion of the door. They will open out and allow airflow without opening the door. Could be handy in Phoenix.


