Friday, August 21, 2020

AeroGraphics

I decided on some graphics for the fuselage. I ordered them from Aerographics. They were really easy to work with and had a quick turn around. I have several ideas and just started with the SuperSTOL logo down the side of the fuselage.

Today, I first leveled the fuselage head rack, then taped the logo in place to see where I wanted it. After futzing with it for a while, I was finally happy with the position. I measure up from the floor to the bottom of the first letter, then matched that in the rear to give me a level layout. I marked the fuselage with pencil registration marks so I place it back into position when ready.


I cleaned the side of the fuselage with a soap and water mixture and wiped it clean. I then wet the surface with the same Dawn/water solution, peeled the backing off the piece, sprayed it and then placed the piece into position. The soapy water solution allows one to fine tune the position the piece. Once in position I used a small plastic squeegee to wick the solution/bubbles from behind the piece. I worked from the center out front and back until most all of the solution was out. Then I slowly and carefully peeled the top layer off leaving the lettering behind. Once the top layer was off, I looked for and squeegeed any remaining bubbles from behind the lettering, gave it a final wipe off and left it to dry overnight.


It went on without a hitch and looks pretty good. Tomorrow, the other side...

Now for the other side of the fuselage. Following the exact same procedure, I set up to mount the logo on the passenger side. No issues and it went on just as smooth.


Wednesday, August 5, 2020

Instrument Panel Avionics Tray

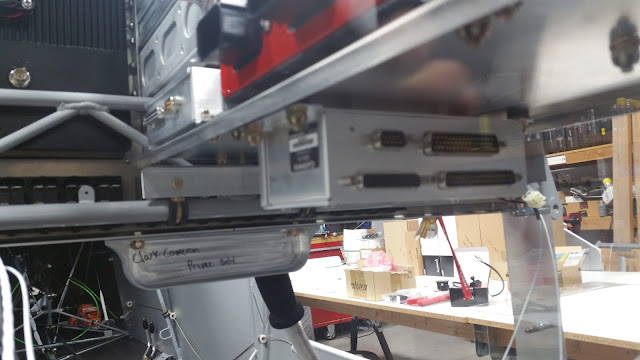
After much head scratching, I decided to go with a single tray from the Truss to the Firewall. I had several iterations of trays, different sizes and shapes before deciding on this one. I worked on laying out the components that need to be installed behind the panel. After discussing it with Chris (Wiring Guy), we both thought this arrangement was the most effective. It calls for the IBBS Backup Battery, VPX Pro, GAD-29, and the GDL-51R on the top with the GEA-24 on the bottom.

Once I finalized the order I set about to drilling the tray for the hardware.

Then mounted all the components.

It all mounted with temp hardware, I'll powder coat the tray before final installation.

I did goof up and switch the GLD-51R and GAD-29 when I drilled the holes. I will switch them before finishing. The GAD-29 allows more access to the D-Sub connector on the back of the GMC-507 Auto pilot controller.

I had the GO-40 CO detector left to find a place for. I ended up using the tabs that were already welded on the cross bracing. I cut out a plate and fitted it to the tabs. Since I wanted to use lock plates I had to install them on the plate, the tabs were too small to install the lock plates in them. Then mounted the CO detector on the bottom facing downward. I could have mounted it on the top side but the clearance to the glare shield (still to be fabricated) would be too tight. No harm in having it facing downward.


Tuesday, August 4, 2020

Panel WIring

Chris came by today to begin work on wiring the panel. He checked out my progress and studied the large wiring diagram I had printed out. Next, we began developing a plan of attack and started separating the spool of wires laying in the cockpit into common groups. Depending on where the final connection would be, we divided the wires either right side or left. 

Then he started wiring the USB connectors in the panel. Since these were so close to the Truss, he decided to solder the connections leaving a few inches of wire where we will add in line connectors. This will allow for easy removal of the USB connector from the panel. 

We then turned to the many switches. We had to figure out just how to wire them in series so we could use one of the dimmers to control the brightness.